Understanding How Ryujinx Handles Downloadable Content
Adding downloadable content (DLC) to a console emulator differs fundamentally from applying an ordinary game update or mod. While updates replace or patch executable game binaries and system libraries, DLC files act as distinct content packages tied to specific sub-indices under the base game's Title ID. When you ask how to add DLC in Ryujinx, the emulator relies on its internal virtual filesystem to map external package files onto the simulated console storage at runtime. This non-destructive architecture means your original base game dump remains clean and unmodified, allowing you to enable, disable, or swap expansion packages without altering core files.
- DLC files are registered as separate content packages linked to the base Title ID.
- Ryujinx loads DLC dynamically from external paths without permanently modifying base game ROM files.
- Multiple DLC packs can be enabled simultaneously in the Manage DLC interface.
- Individual DLC packages can be toggled on or off to troubleshoot compatibility or performance issues.
Prerequisites and Supported Package Formats
Before installing expansion content, ensure your environment meets the emulator's cryptographic and filesystem requirements. Ryujinx Canary accepts DLC in NSP (Nintendo Submission Package) and XCI formats. However, DLC packages frequently require a newer system firmware version than the original base release because publishers compile expansions using newer SDK revisions. If your prod.keys file or installed firmware lacks the cryptographic keys required to decrypt the DLC's container header, Ryujinx cannot mount the content, resulting in silent launch failures or parsing errors.
| Package Component |
Supported Format |
Key Requirement |
Common Pitfall |
| Base Game |
.nsp, .xci, .nca |
Matches master prod.keys |
Using outdated dump with trimmed headers |
| Game Update |
.nsp |
Required by newer DLC |
Skipping update required for DLC compatibility |
| DLC Expansion |
.nsp, .xci |
Matching Title ID & revision |
Using DLC from mismatched region or wrong Title ID |
| System Firmware |
Extracted firmware ZIP |
Must support DLC crypto |
Running outdated firmware with modern DLC releases |
Detailed Step-by-Step Walkthrough to Install DLC
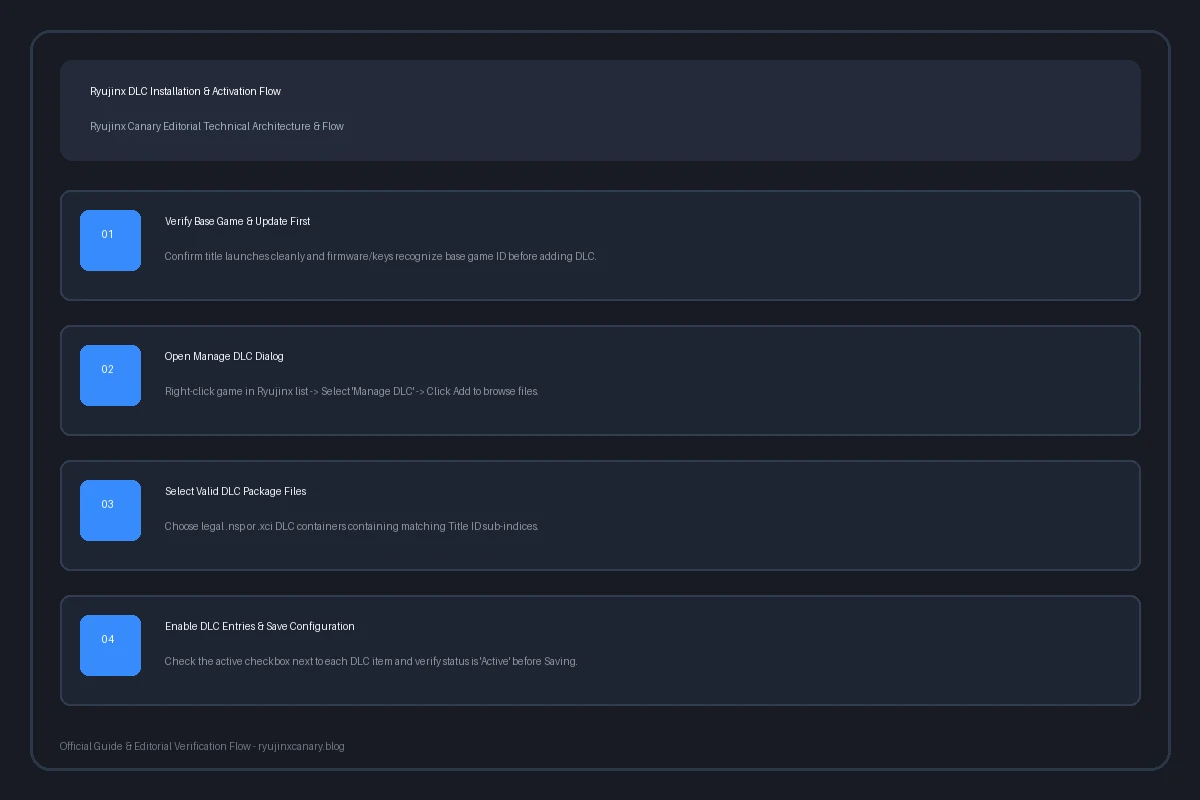
To successfully configure your downloadable content, open Ryujinx Canary and verify your game directory is properly scanned. Locate the game in your library list. Right-click the title and choose 'Manage DLC'. Inside the modal window, click 'Add' and navigate to the directory where your dumped DLC files reside. Once selected, Ryujinx parses the container header to extract the title name and content index. Make sure each expansion line item displays a checked box under the enabled column. Click 'Save' to commit changes to the emulator configuration file. When you next launch the game, the emulator's content manager loads the DLC alongside base assets automatically.
- Step 1: Open Ryujinx Canary and ensure the target game displays its correct icon and Title ID.
- Step 2: Right-click the game row and choose 'Manage DLC' from the context options.
- Step 3: Click the 'Add' button located at the bottom of the dialogue window.
- Step 4: Browse your drive, select the legal .nsp or .xci DLC file, and click Open.
- Step 5: Verify the checkbox is enabled, then click 'Save' to apply your configuration.
The Title ID and Version Matching Hierarchy
The single most frequent reason DLC fails to activate is a mismatch between the base game's Title ID and the DLC's container identifier. Console games use a 16-character hexadecimal Title ID (such as 0100000000010000). The base game ends with 000, updates end with 800, and DLC packages increment upward from 001 to 01F or higher. If you attempt to add DLC dumped from a North American cartridge to a European digital base game, the Title IDs will not align, and Ryujinx will reject the file or fail to display the additional content in-game.
| Content Type |
Title ID Suffix Pattern |
Example ID |
Role in Emulator |
| Base Game |
Ends in 000 |
01006F8002326000 |
Core executable code and initial game assets |
| Update Patch |
Ends in 800 |
01006F8002326800 |
Overwrites binaries, fixes bugs, adds engine features |
| DLC Pack 1 |
Ends in 001 |
01006F8002326001 |
Supplemental content, maps, characters, or story packs |
| DLC Pack 2 |
Ends in 002+ |
01006F8002326002 |
Additional standalone expansion packs or season pass content |
Troubleshooting Common Ryujinx DLC Errors
When working with expansion content, users occasionally encounter warning dialogs or missing in-game features. Here is how to diagnose and resolve the most prevalent issues encountered in Ryujinx Canary:
- Error 'The specified file does not contain a DLC for the selected title': This indicates that the chosen NSP file is actually an update, a base game, or an expansion intended for a different regional Title ID. Verify the filename and container type.
- Black screen or crash on startup after adding DLC: This usually means the DLC requires a higher firmware version or a mandatory game update. Update your installed firmware and install the latest game patch via 'Manage Title Updates'.
- DLC shows as active in Ryujinx but content is missing in-game: Many games require progressing past the introductory tutorial or prologue chapter before DLC quests, outfits, or characters unlock.
- DLC list clears itself after emulator update: In rare instances where Ryujinx Canary configuration resets, simply re-open 'Manage DLC', click 'Add', re-select your file paths, and save.
Differences Between DLC, Title Updates, and Mods
Understanding the technical boundary between DLC, updates, and community mods helps prevent configuration mistakes. In Ryujinx, Title Updates are managed under 'Manage Title Updates', DLC is managed under 'Manage DLC', and game modifications are placed in the 'mods' directory accessed via 'Open Mods Directory'. Confusing these three mechanisms is a primary cause of broken game saves or crash-on-launch states. Always keep your updates and DLC files in separate, well-organized folders on your storage drive.
| Feature |
Downloadable Content (DLC) |
Title Updates |
Community Mods |
| Management Menu |
Manage DLC |
Manage Title Updates |
Open Mods Directory |
| File Type |
.nsp / .xci packages |
.nsp update packages |
Loose RomFS / ExeFS folders |
| Primary Purpose |
Extra levels, characters, expansion storylines |
Bug fixes, performance improvements, engine patches |
Custom textures, 60 FPS patches, cheats, visual tweaks |
| Firmware Impact |
May require newer firmware keys |
Frequently requires newer firmware keys |
Dependent on game executable version |
Best Practices for Organizing DLC
Maintaining a clean emulator installation ensures your expansion content remains reliable. Store legally obtained DLC in a dedicated subfolder alongside your ROM collection. Never move files while Ryujinx is running, and back up saves regularly.
- Store base games, updates, and DLC in dedicated subdirectories.
- Do not rename or move DLC files after linking them in Manage DLC.
- Back up your save directory before enabling expansion packs.
- Verify firmware and prod.keys versions when a new DLC pack launches.